Start here
In this guide, you'll learn how to create a board, upload or import files, view modes, sharing and inviting others to collaborate or collect feedbacks.
Welcome to Playbook! If you've just landed in Playbook, you don't need to know every feature or have a perfect structure in mind to get started. Most people start by creating a board, dropping files in, and sharing it with someone else. This guide walks you through that exact flow so you can go from an empty workspace to a shared board, in just a few steps.
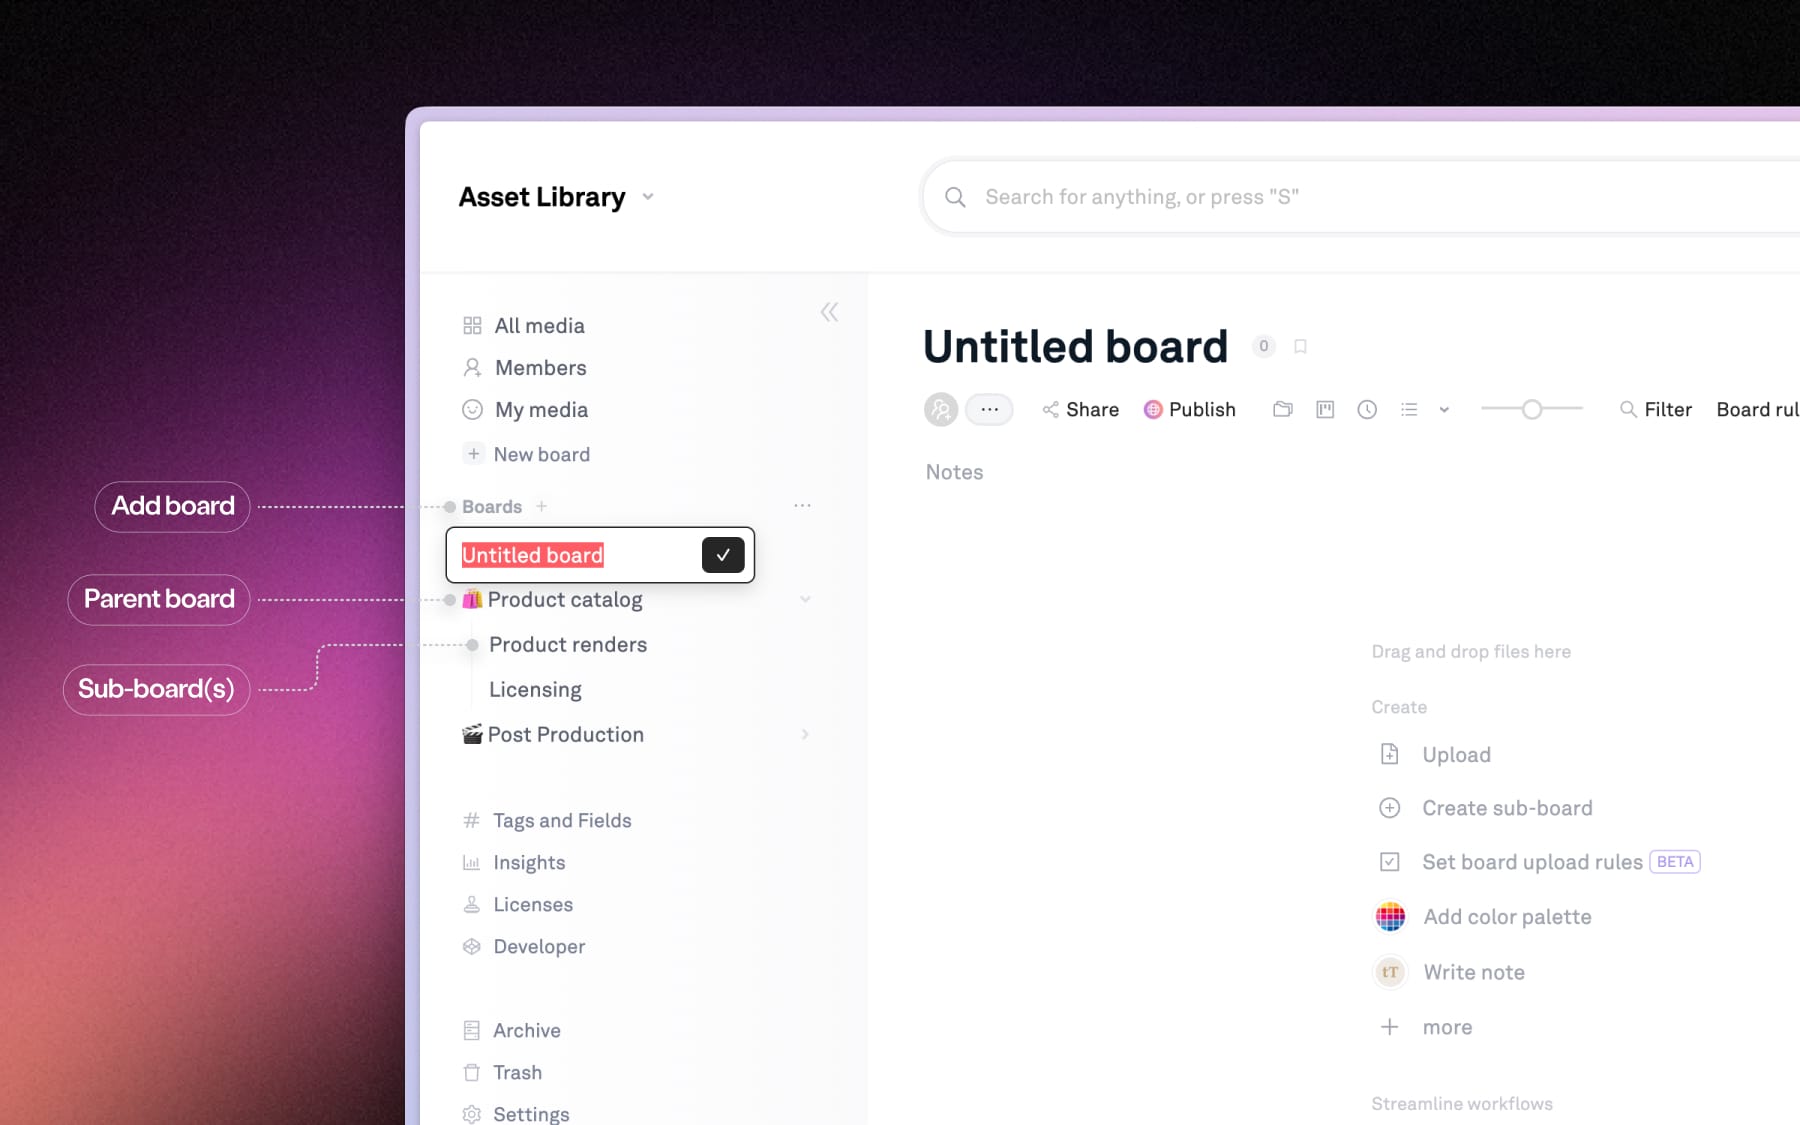
Step 1: Create a board
Once you've finished creating your new workspace, add your first board in Playbook. Boards and sub-boards are where projects live and where files stay connected overtime. You can always select the title at the top of your board to quickly rename it as the project evolves.
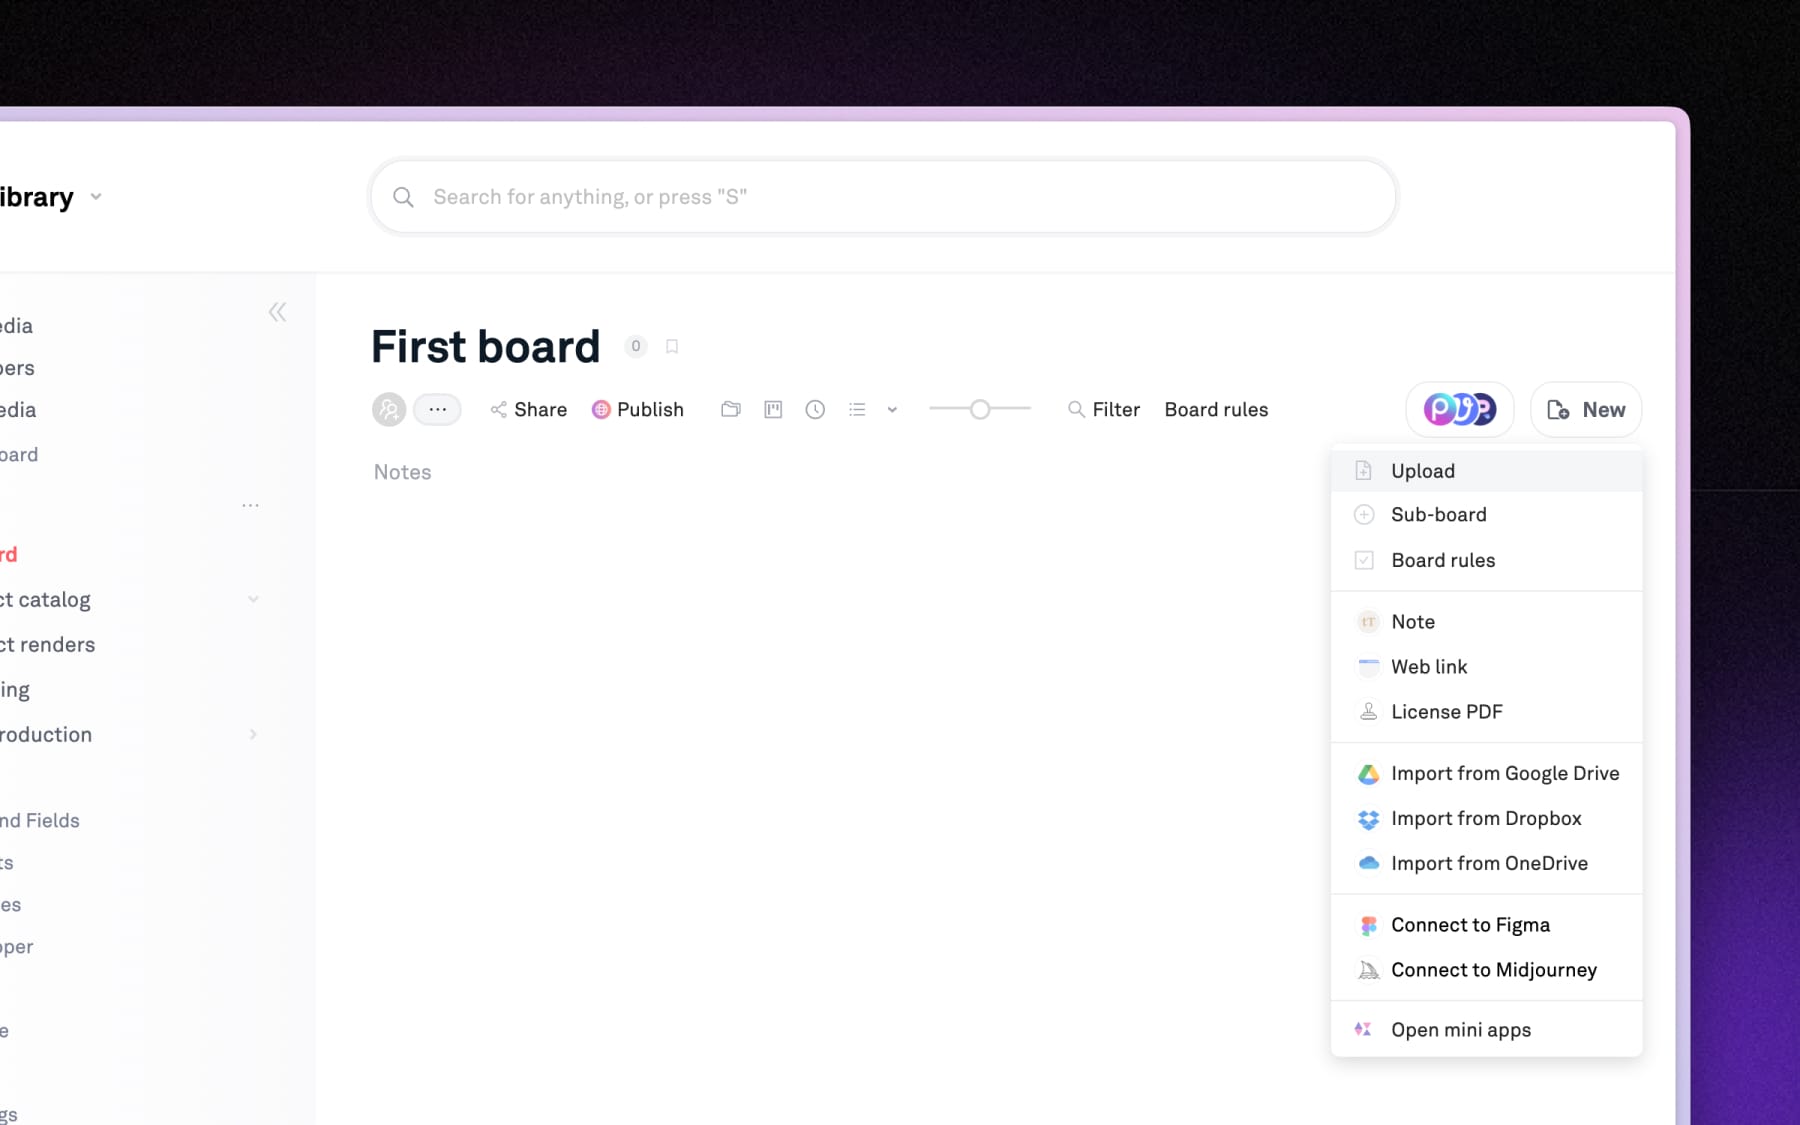
Step 2: Upload assets or folders
Add images, videos, PDFs, or documents by dragging them into your board in Playbook. Or select (+ New) to upload files/folders from your devices, or import existing files from Google Drive, Dropbox, or OneDrive.
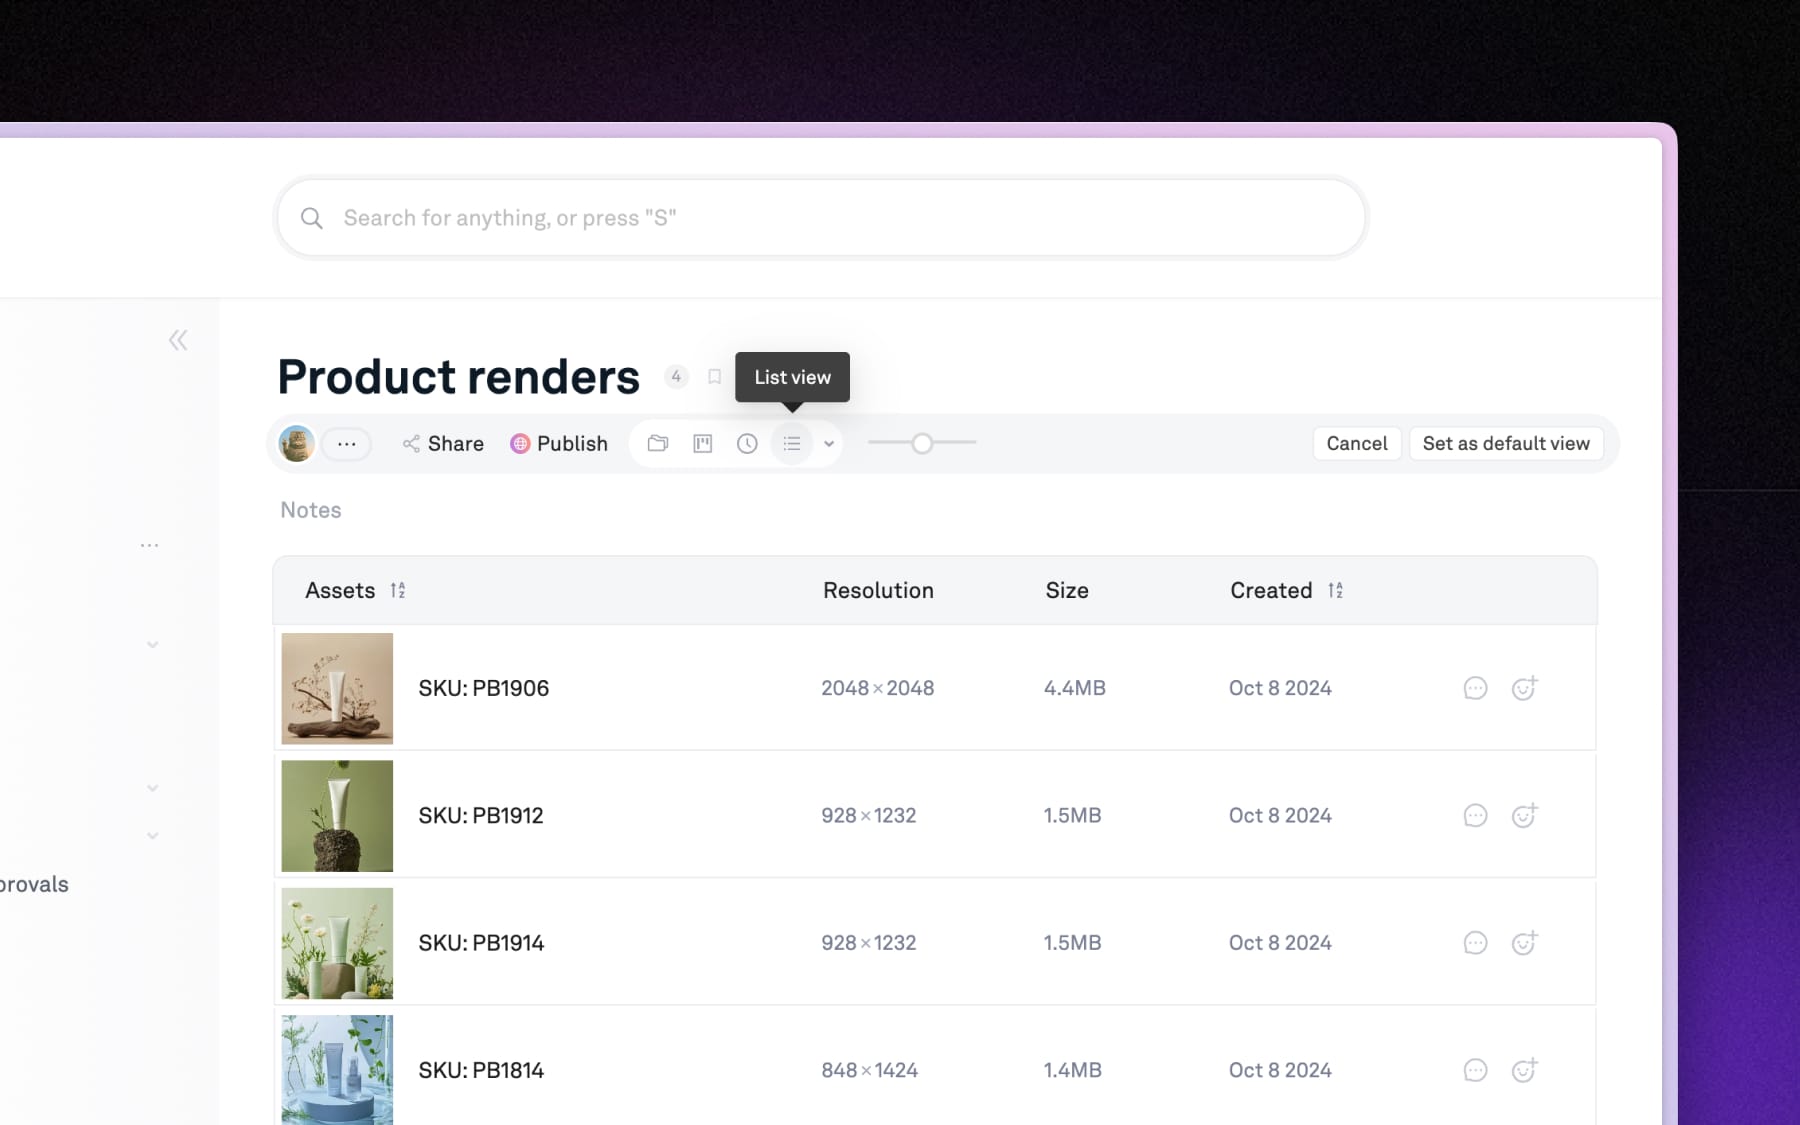
Step 3: View assets
Click any asset to open it and see more details. At the top of your board, you can switch between Nested view (default), Timeline, List or Simple folder view – giving full flexibility to look at your assets your way. If you have a preferred view, you can set it as default view for your workspace in Settings → Preferences.
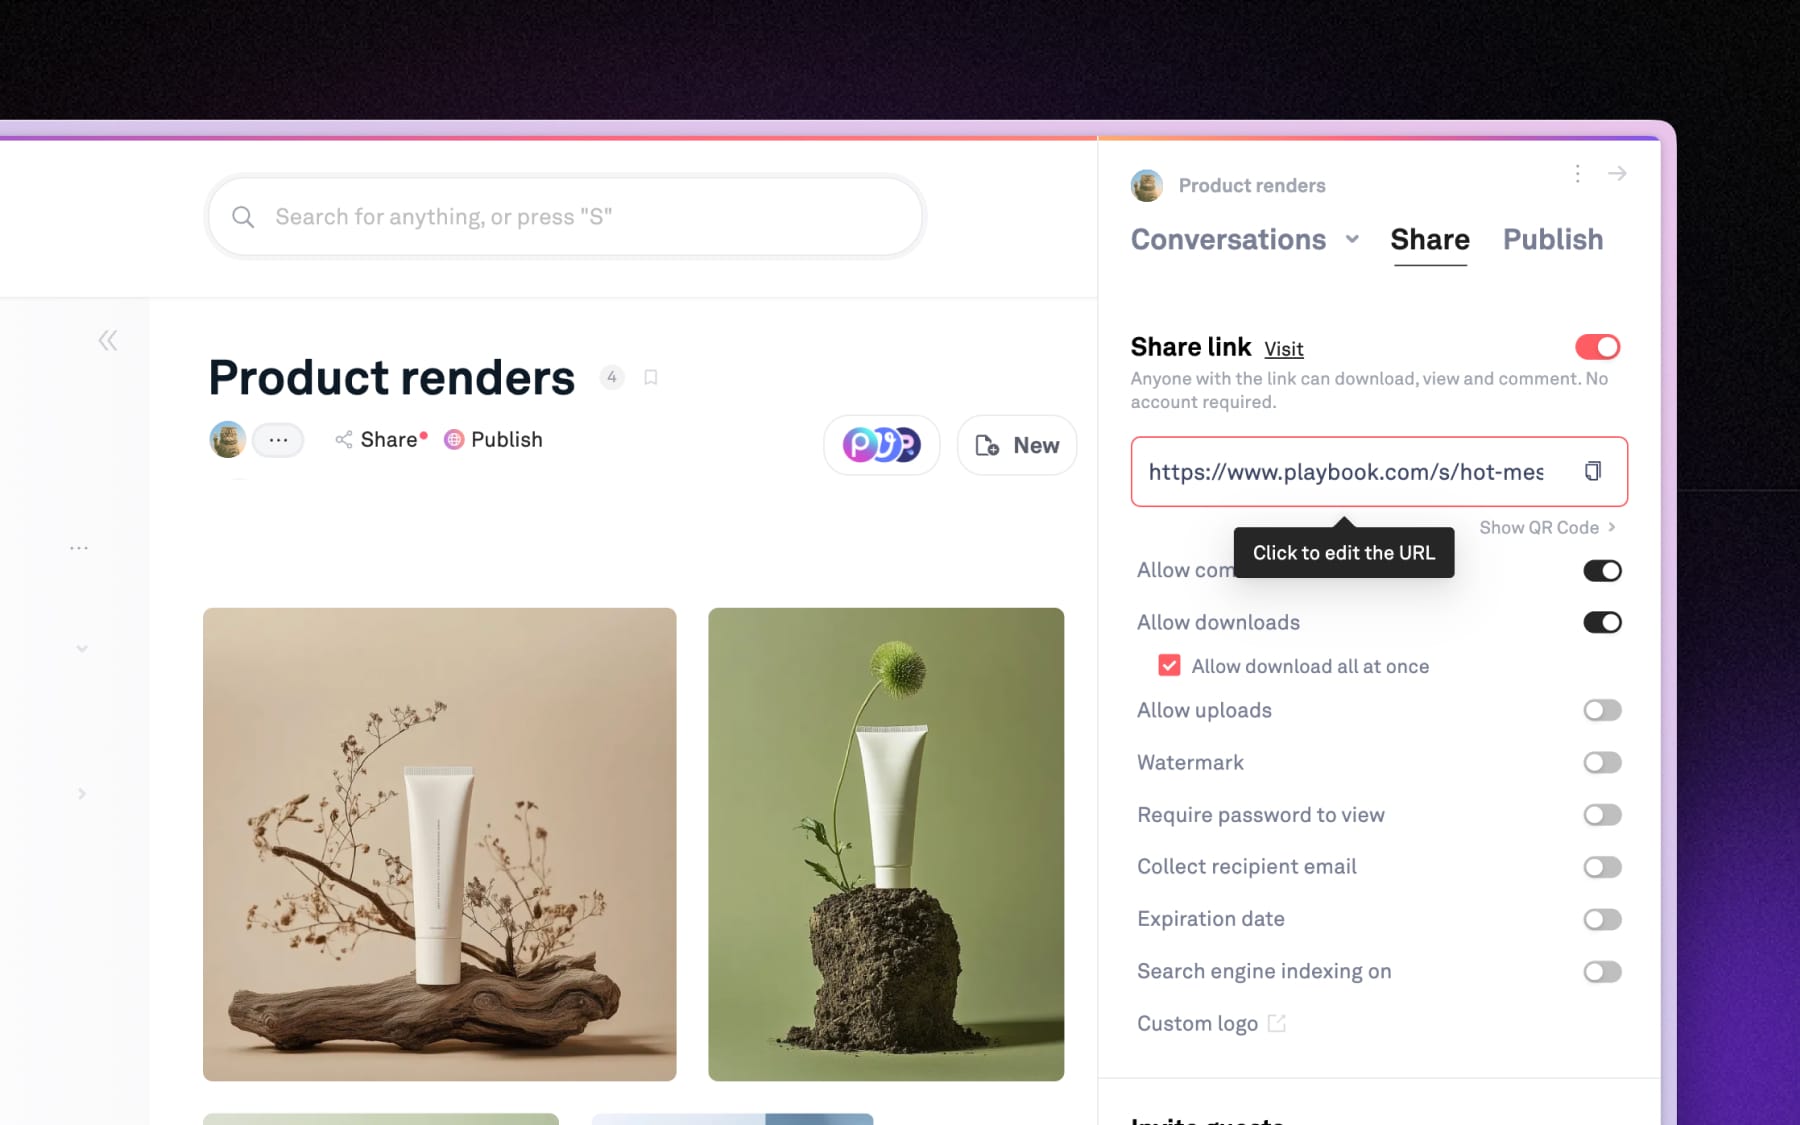
Step 4: Share a board
Select Share → Enable shared link to share a board in Playbook to get feedbacks or reviews. Anyone with the link can instantly view, download and leave comments on your assets. With live-update, any changes made to the board will reflect in the shared links instantly without having to keep resharing the link.
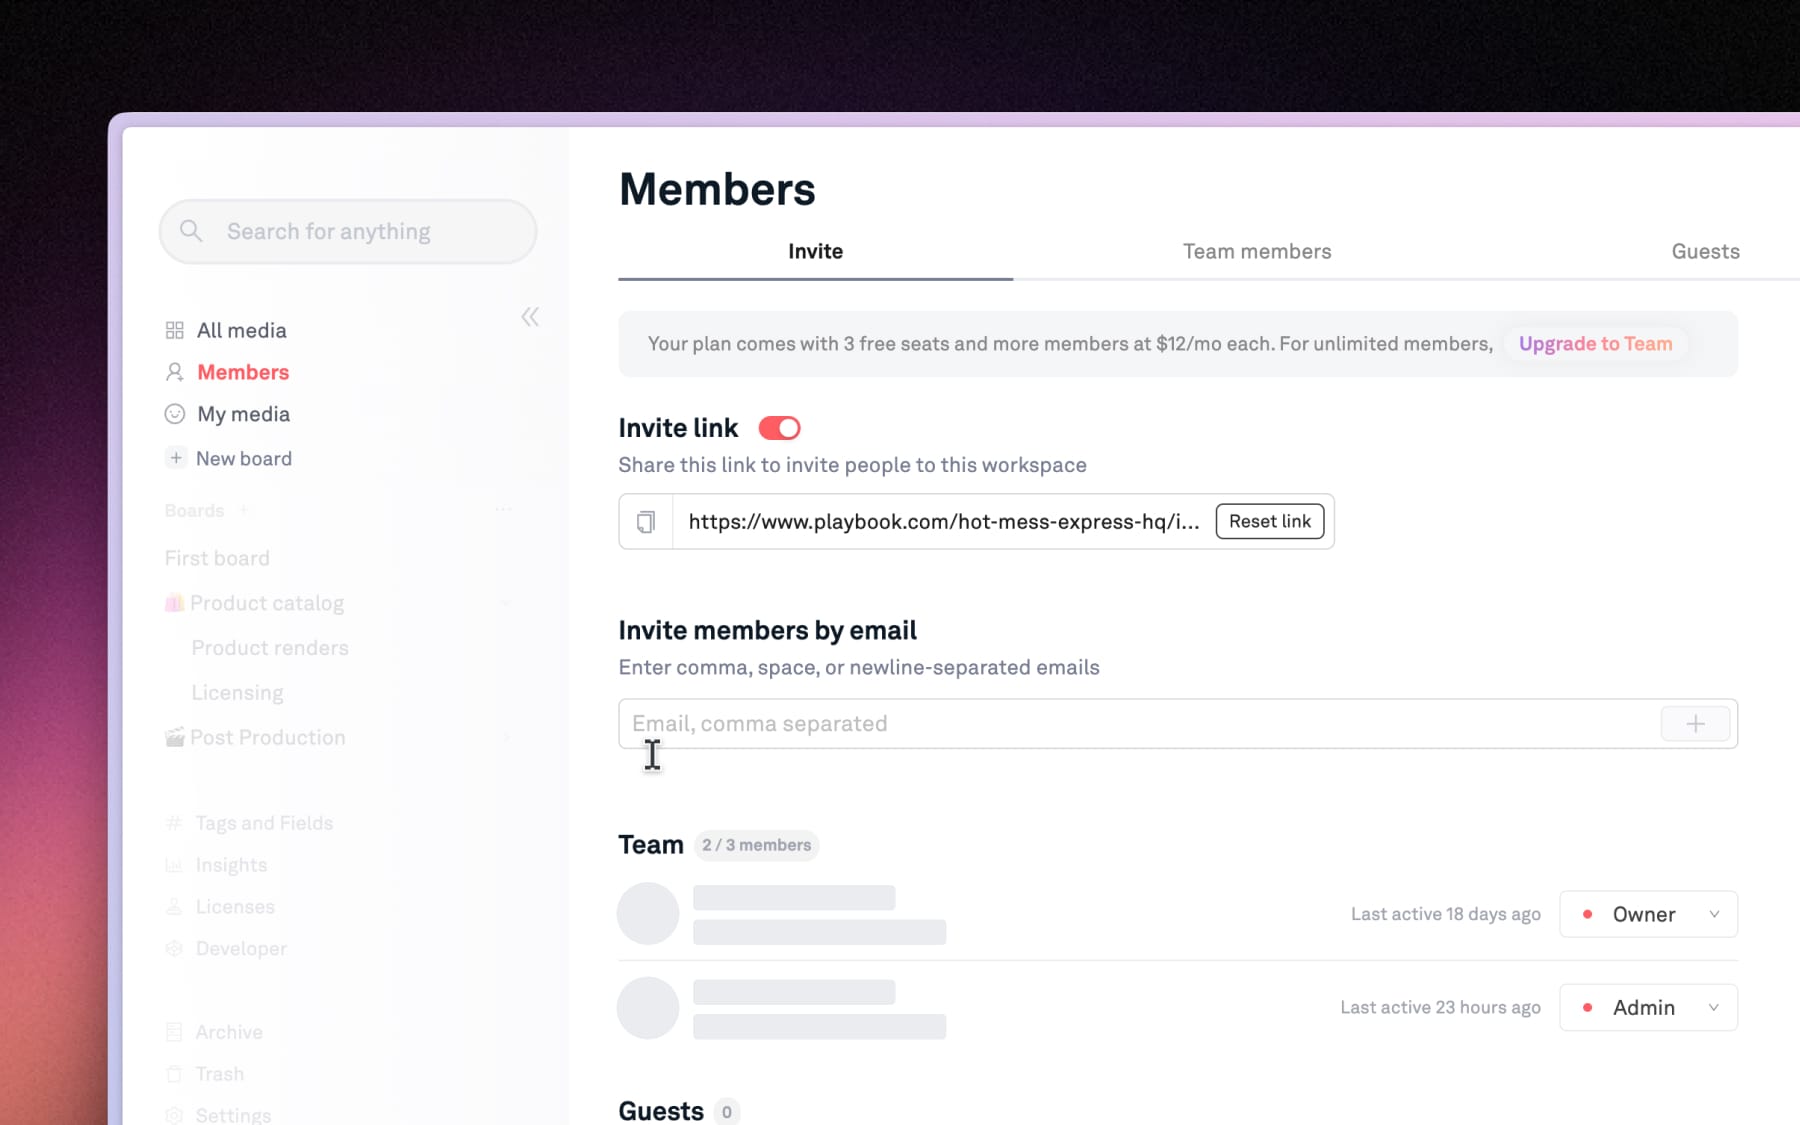
Step 5: Invite people
To share access to your entire Playbook workspace, you can invite teammates by email or invite link from the Members page. Or open a board and select Share → Invite Guests to limit their access to only specific boards.