How to create & manage tags
Learn how to manually tag your assets for perfect organization and manage them across your workspace.
In Playbook, tagging instantly transforms your library into a searchable database where you can find exactly what you need in seconds.
Two ways to add manual #Tags
Manual #tags add the specific context that matters to you and your team. You can them to individual asset or in large batch at once.
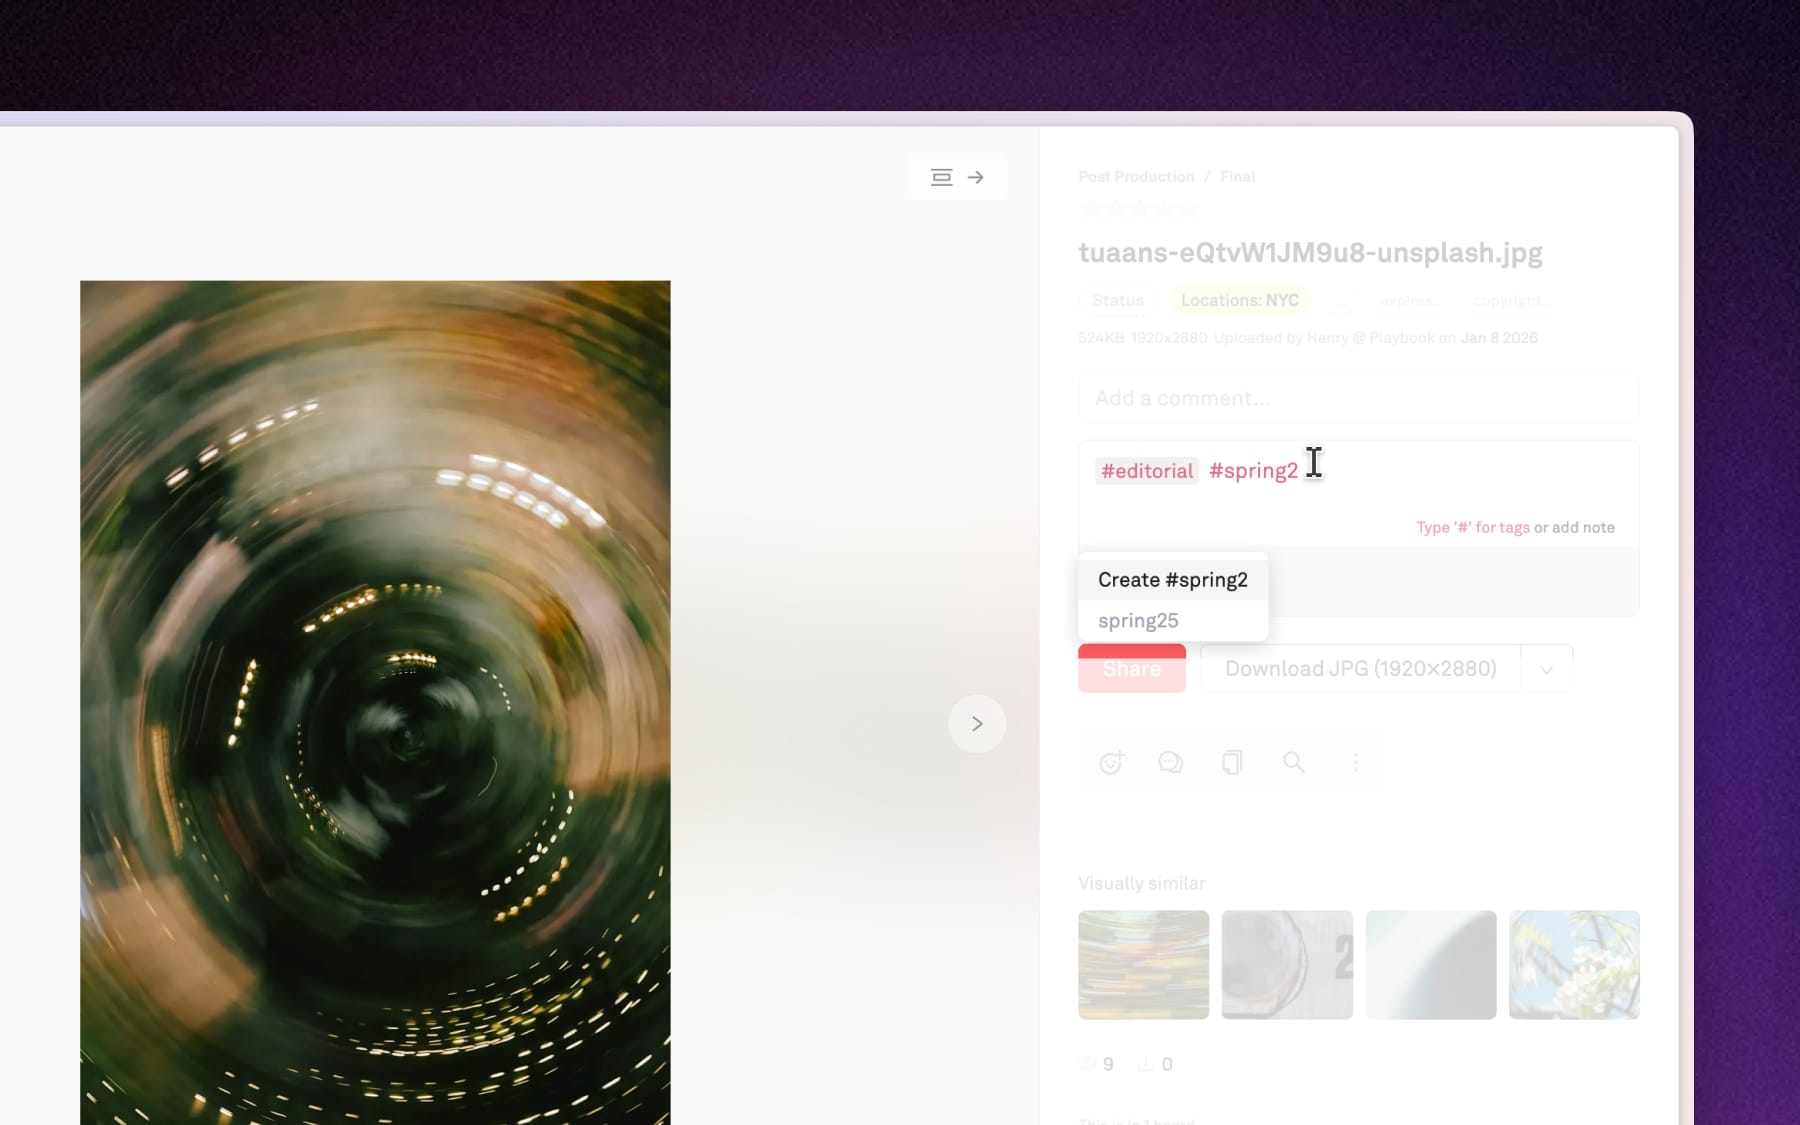
Option A: Individual tagging
Click any asset to open the Info panel on the right side. Within asset's note, simply type '#' followed by your keyword to instantly create or assign a tag to that asset.
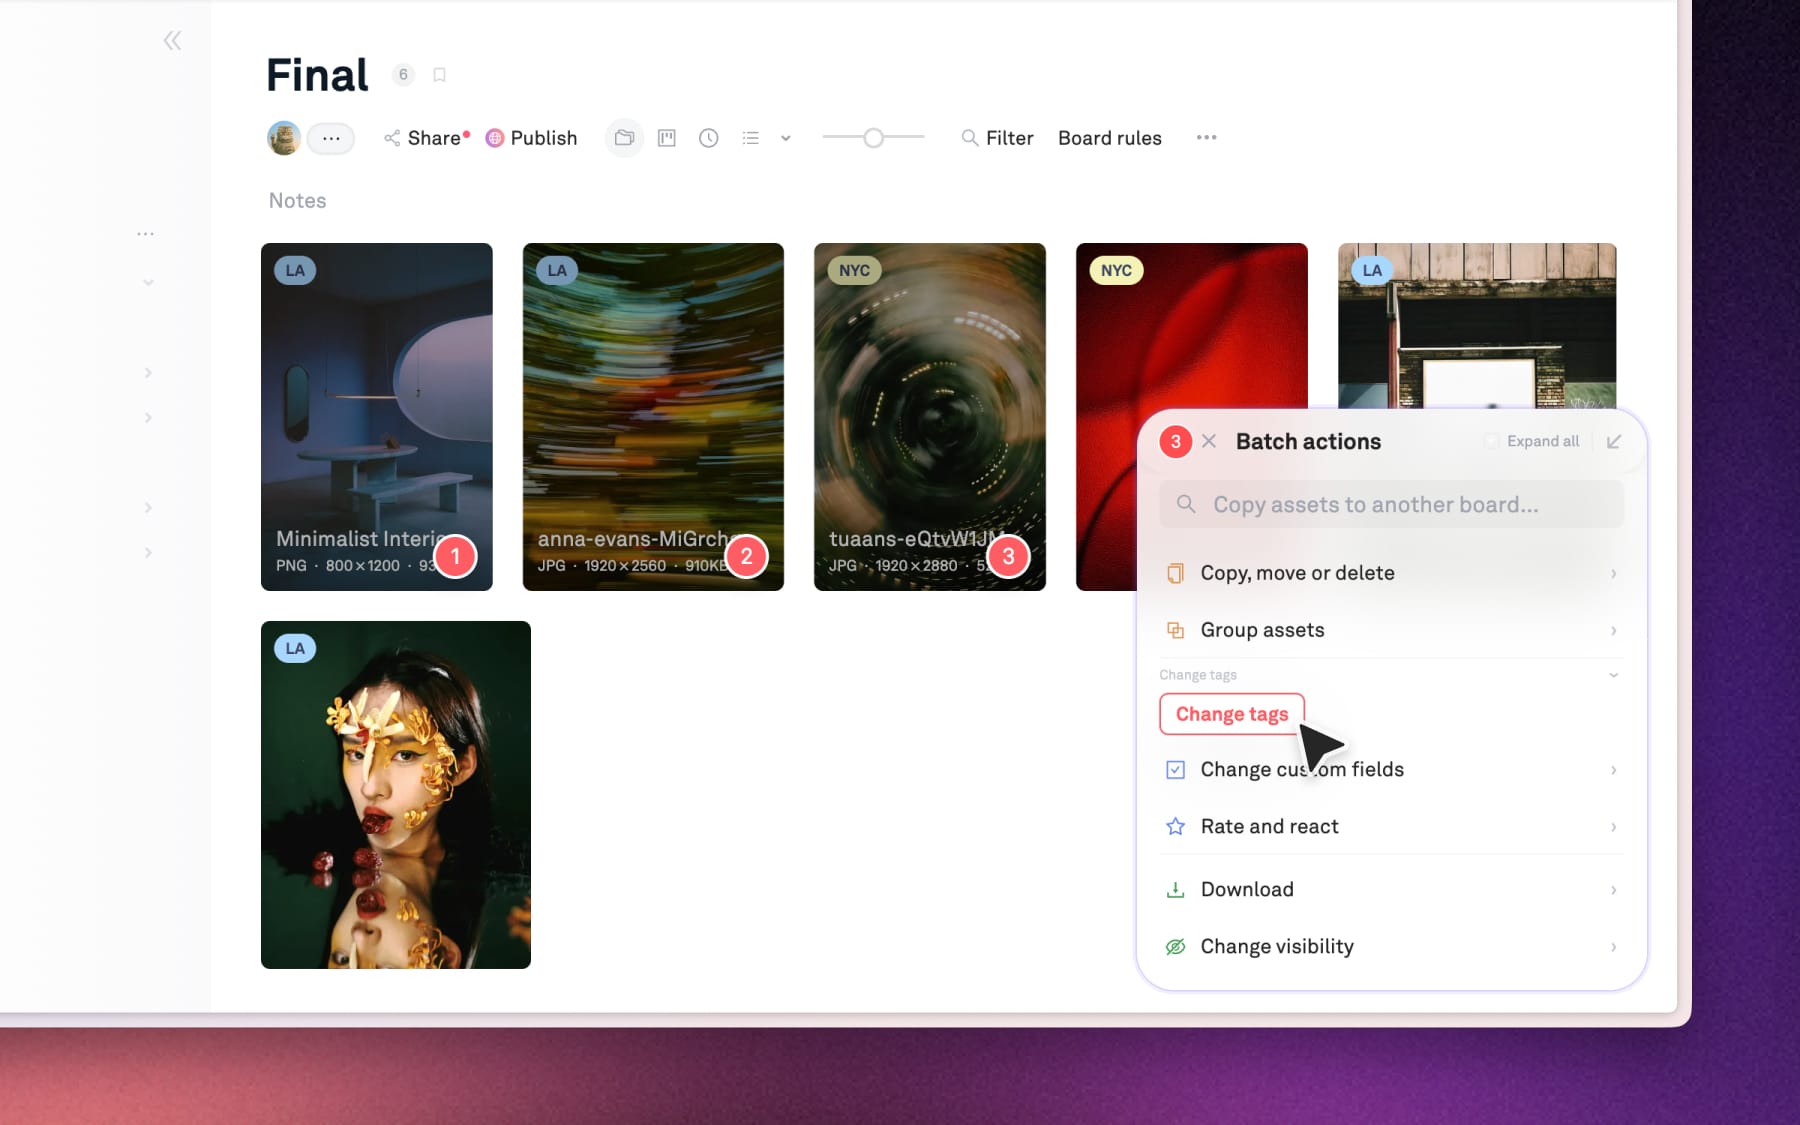
Option B: Bulk tagging with Batch actions
If you have a large group of files that all need the same tag, use Batch actions so you don't do it one by one:
- Multi-select asset: Click the checkmark or drag to select multiple assets.
- Open Batch actions: Click the option 'Change tags'
- Apply tags: Start typing '#' to select tags and click 'Continue' to apply your tags.
Managing #Tags across your workspace
The global Tags page in your sidebar give you a bird's-eye view of your entire organization system. From here, you can see every tag in your workspace and manage which assets belong to them.
Click on Tags and Fields in the left sidebar to open your global tag manager. Here's what you can do within this page:
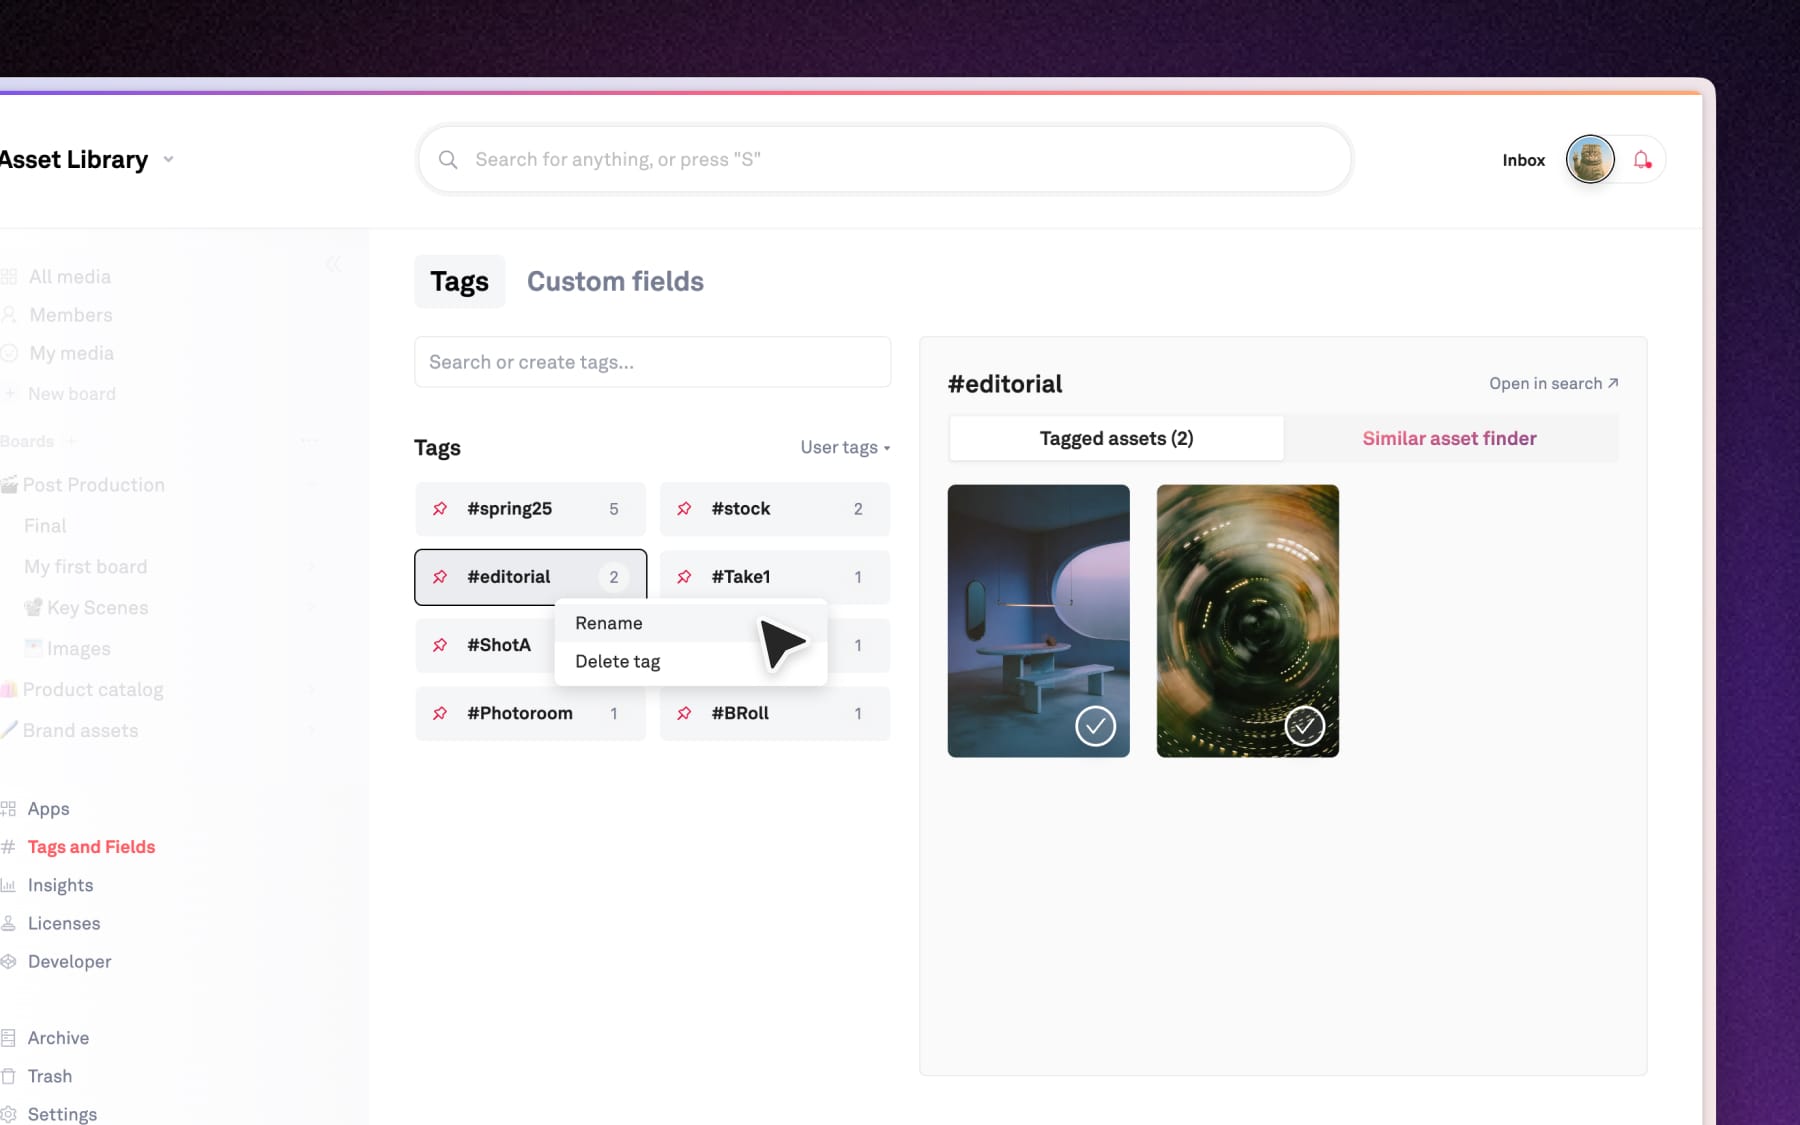
Rename or Delete existing tags
Click on the (•••) icon next to any tag and choose Rename or Delete from the dropdown. Changes apply across your entire workspace, including assets that already use that tag.
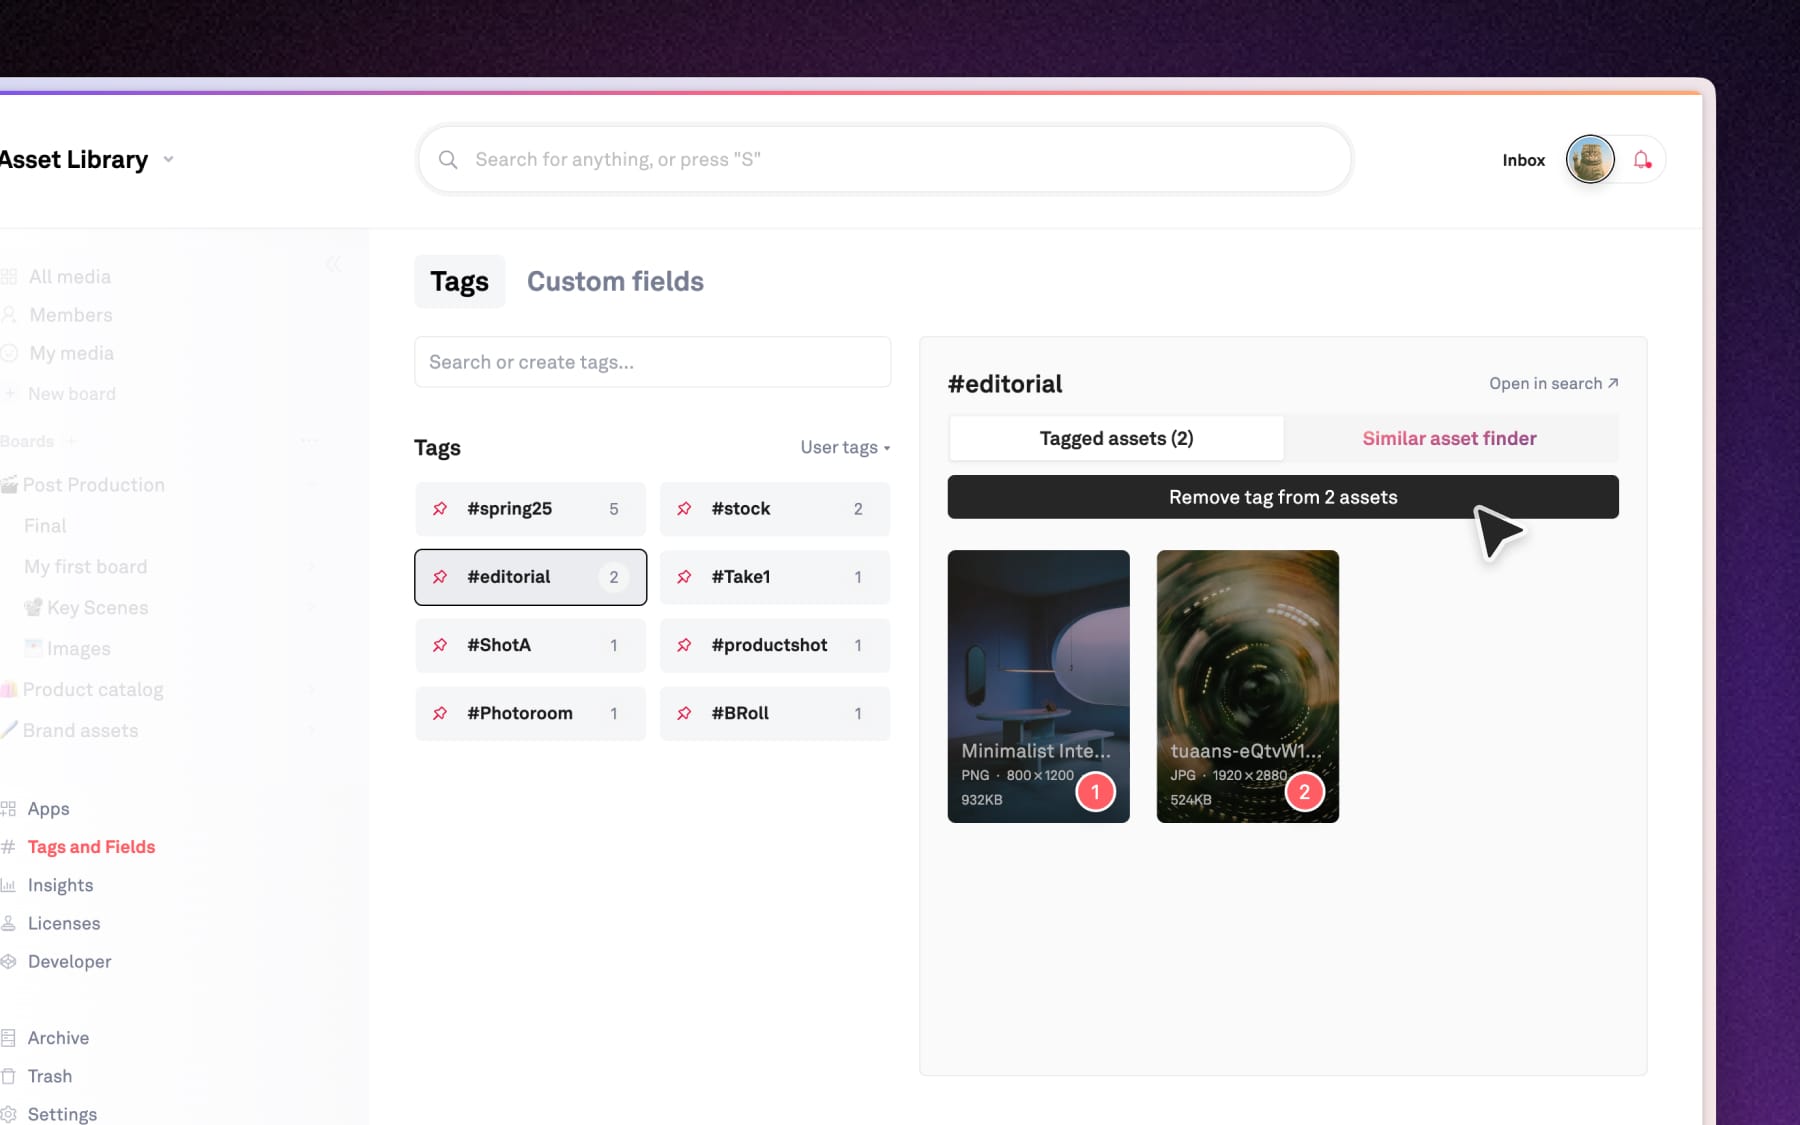
Un-assign tags in bulk
Click on any tag from the list to see every asset assigned to it on the right panel. Multi-select the tagged assets → click 'Remove tag fro [X] assets' at the top.